Dind.io Domain Redirect Guide
1. Introduction
On Dind.io, you can redirect your own domain to the services you are running. This feature allows users to give their applications a more professional appearance and makes their projects more easily accessible. In this guide, we will show you step by step how to point the @ record to your "WordPress" service and the ci subdomain to your "Jenkins" service.
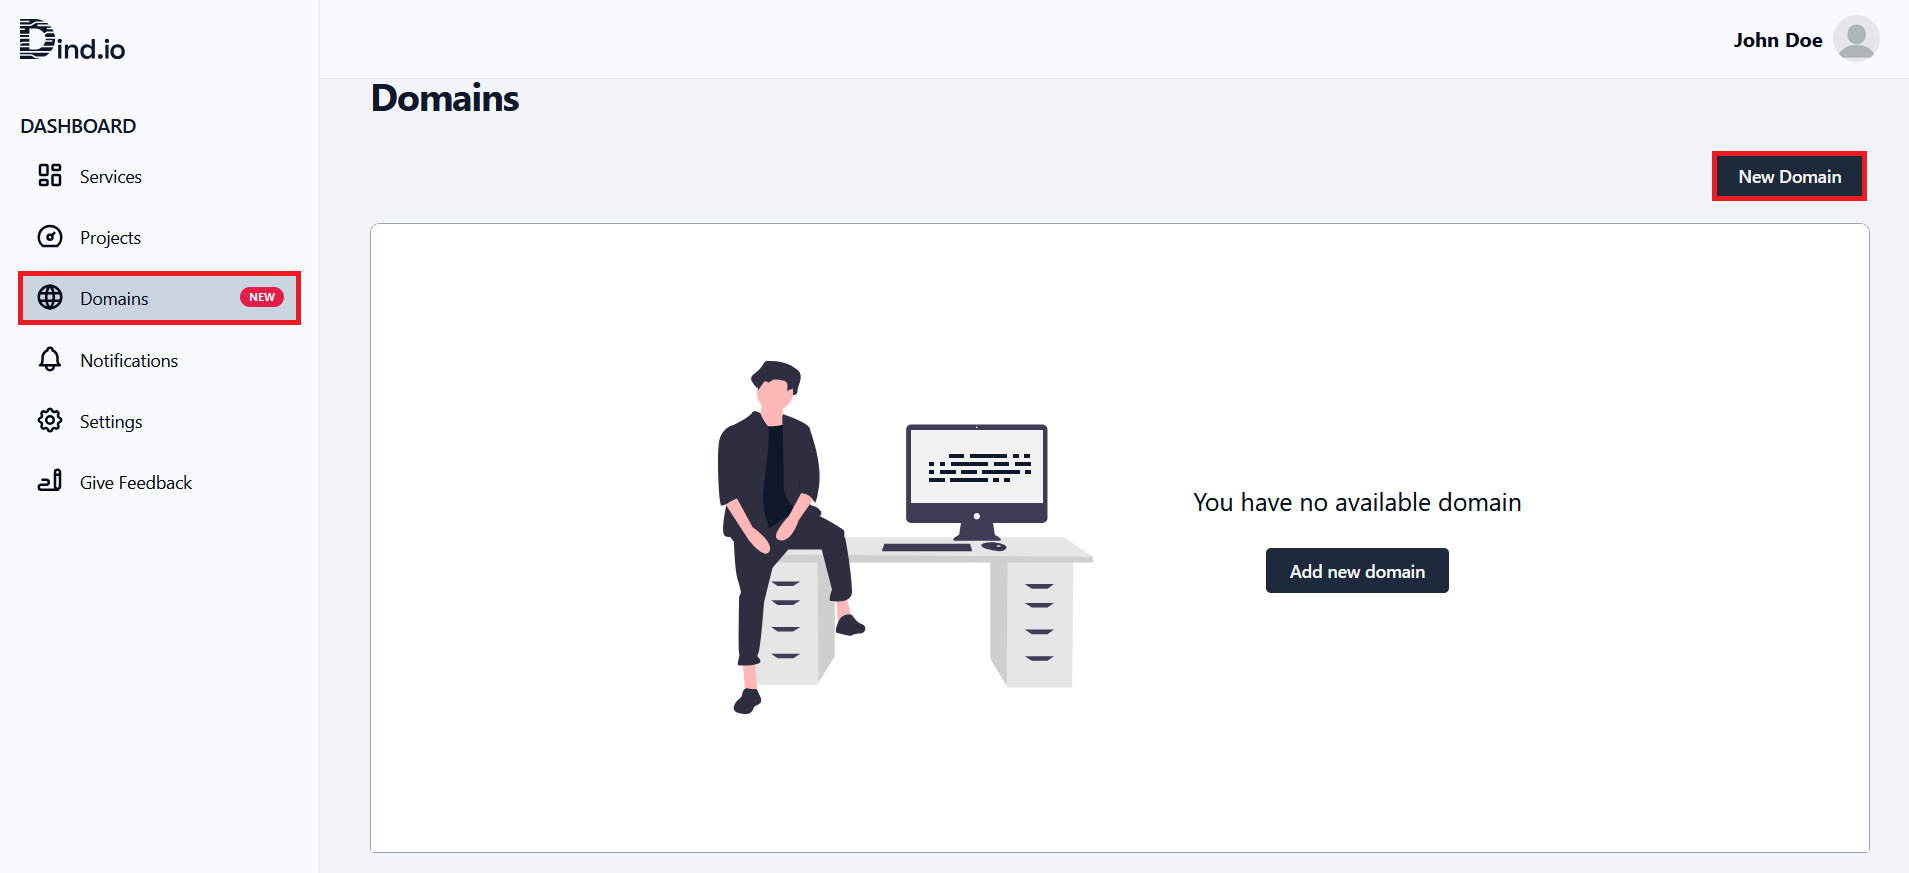
2. Adding a Domain
- Log in to the Dind.io platform.
- From the left menu, select the "Domains" tab.
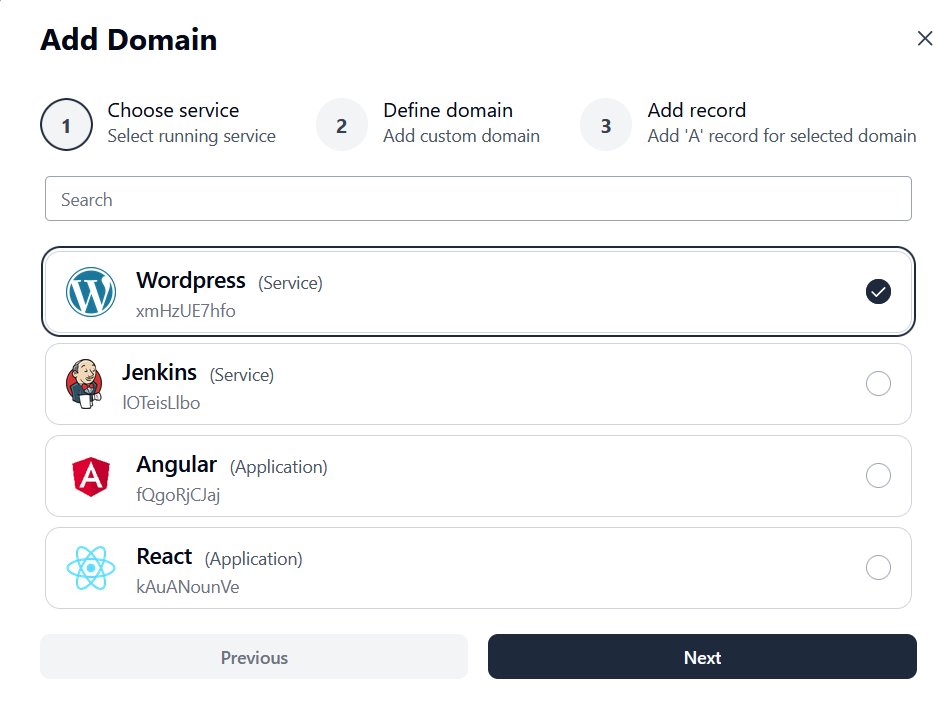
- Click the "Add New Domain" or "New Domain" button. The domain addition process consists of three steps.
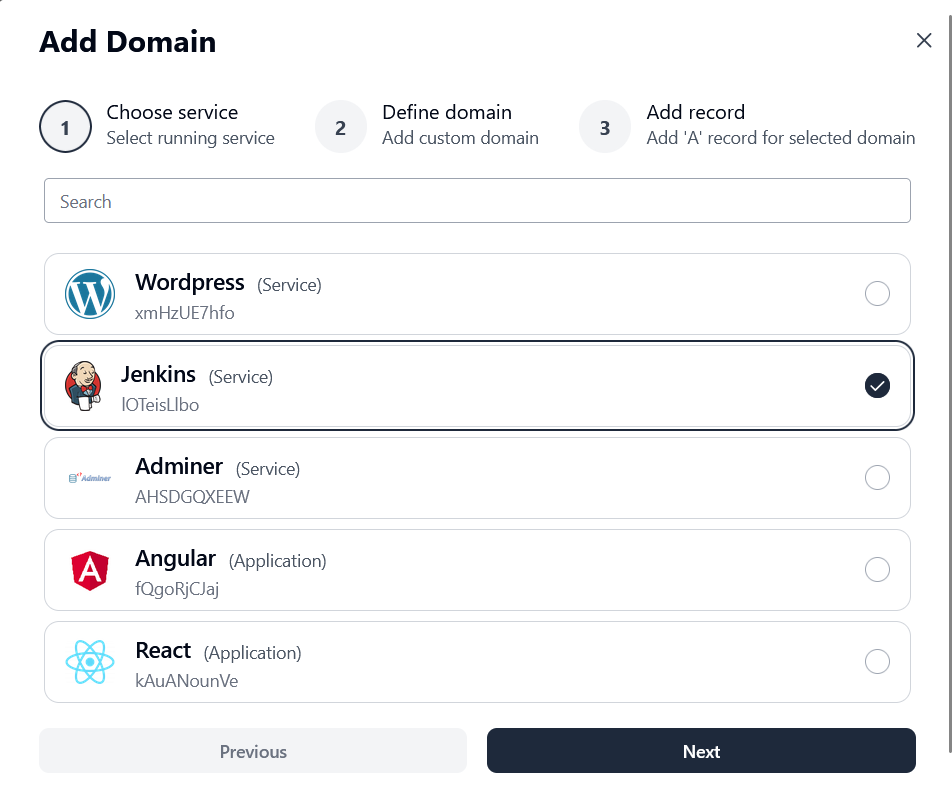
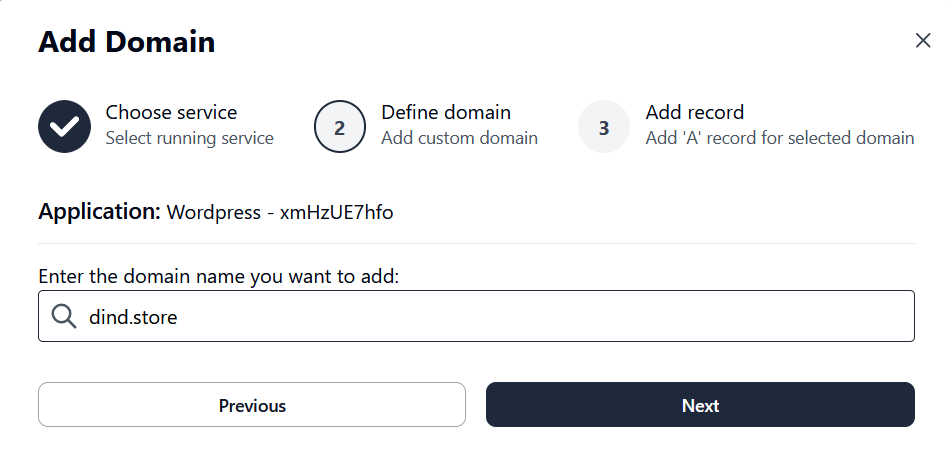
- In the first step, select the service or application you want to redirect the domain to from the list that appears. We will first choose our Jenkins service for the ci.dind.store domain.
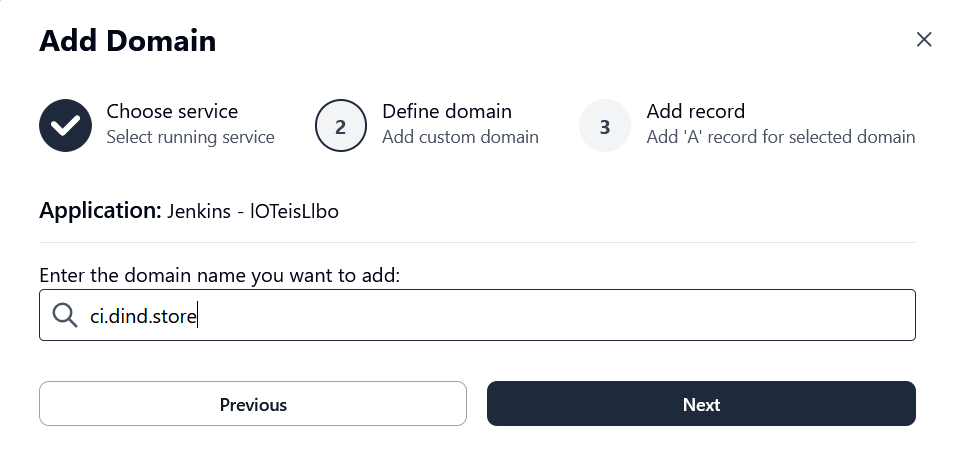
- In the second step, enter the domain name. In our case, we will enter the ci.dind.store subdomain address, as mentioned earlier.
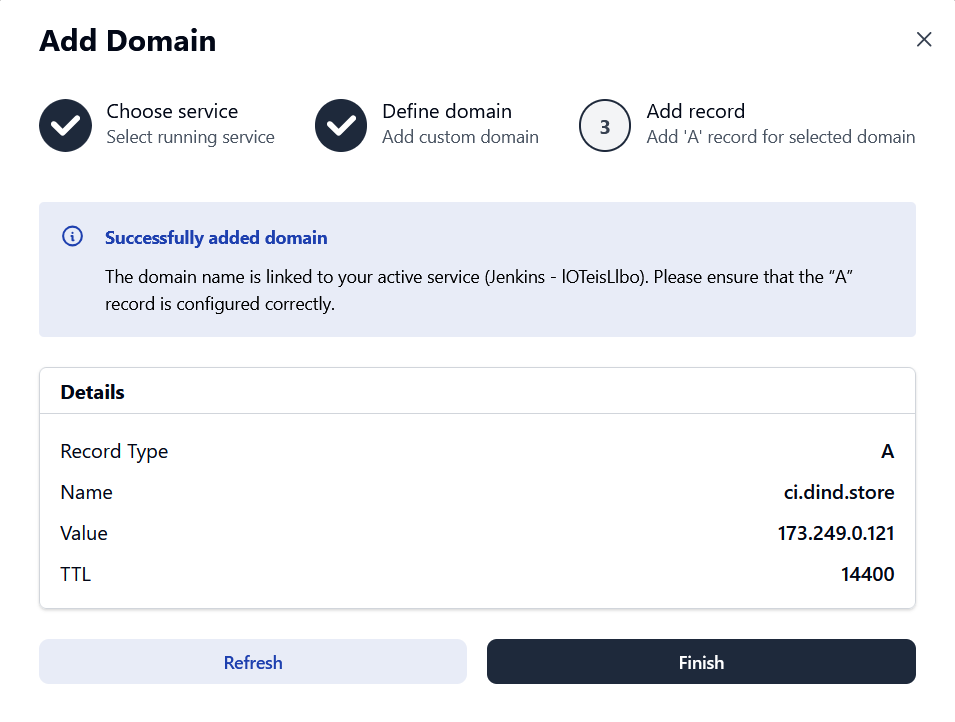
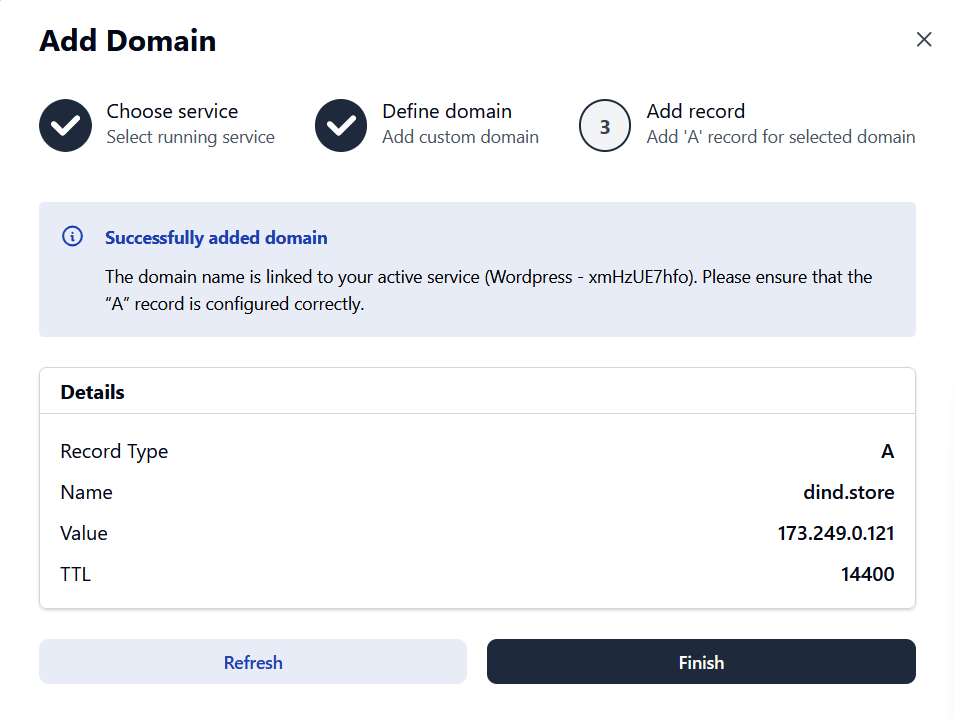
 In the final step, we complete the process by clicking "Finish" on the page that indicates the necessary records need to be added for the domain to work.
 Later, when we check the details of the domain we added, we can see that our domain is displayed as "Not Configured" because we haven't added the DNS records yet.
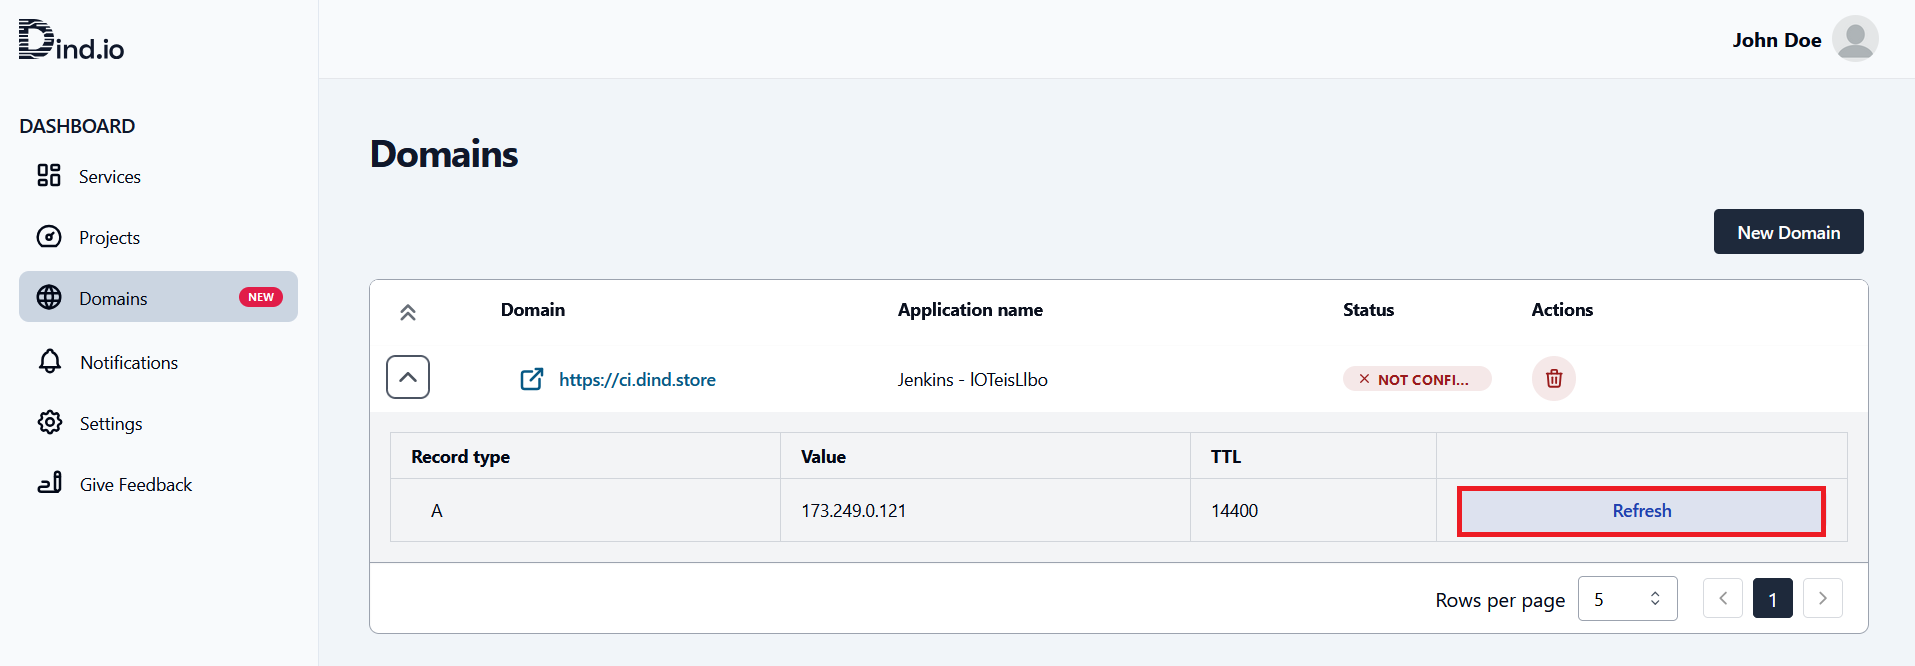 To fix this, we need to make the necessary DNS settings with our domain provider.
 - After entering the domain, it will be registered on the platform. Once this step is completed, you can proceed to make the necessary DNS settings with your domain provider.
3. DNS Settings
We will need to make the DNS settings with our domain provider. In this step, we must correctly point the @ record and the ci subdomain.
Pointing "@" Record
- We log in to our domain provider's control panel.
- We locate the DNS settings for our domain.
- We create the @ record and enter the following IP address: 173.249.0.121 (The IP address may change; you can obtain the correct IP address from the Dind.io platform in the final step of the domain addition process).
- We save the DNS record.
- By following the same steps mentioned above, we create and save an A record for the "ci" subdomain.

- Let's check the domain we added again on the Dind.io platform.
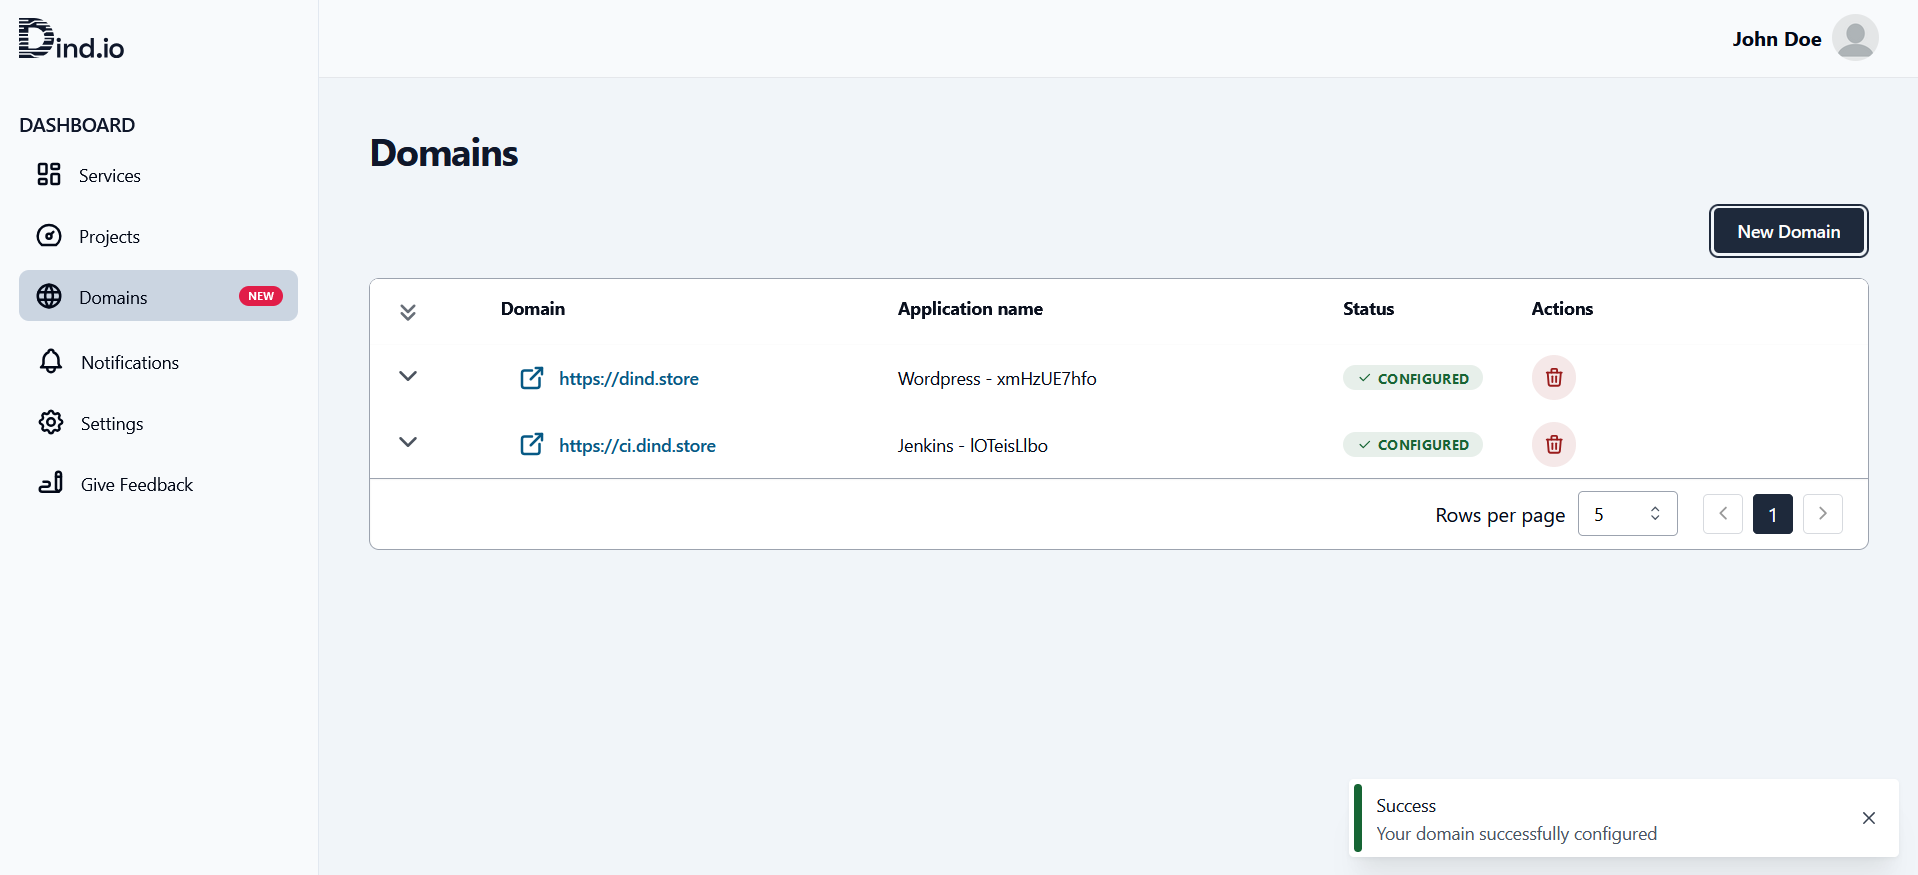
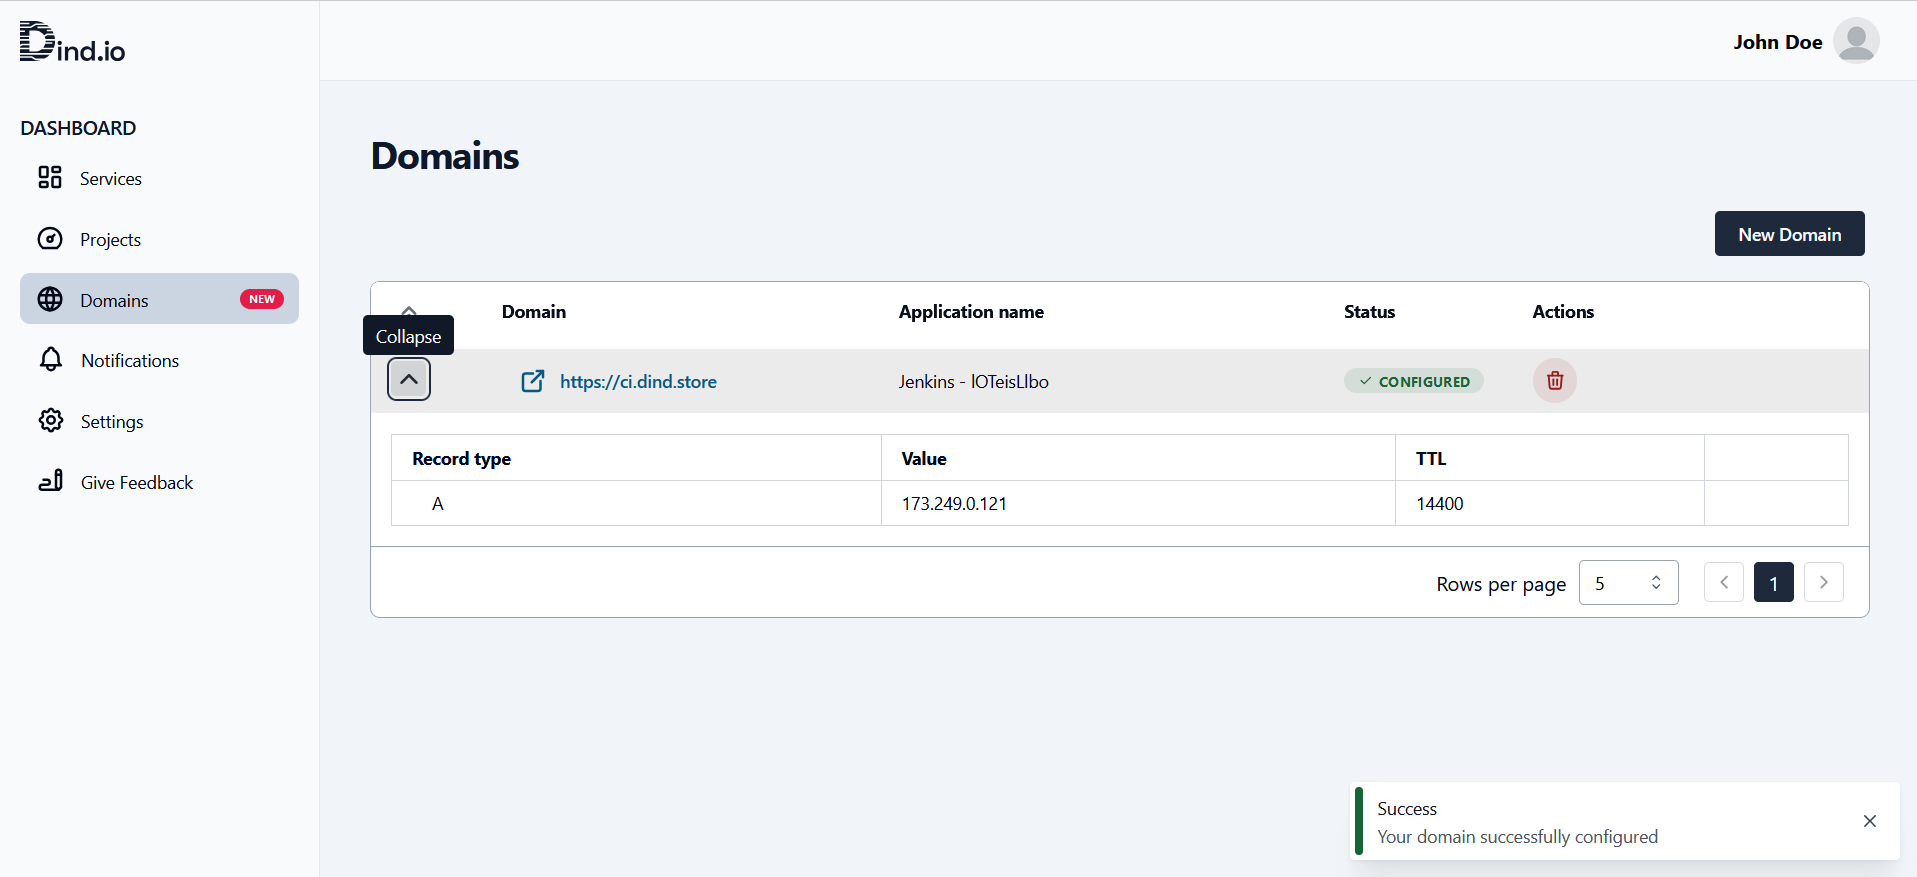 And as we can see, our domain is now marked as "Configured."
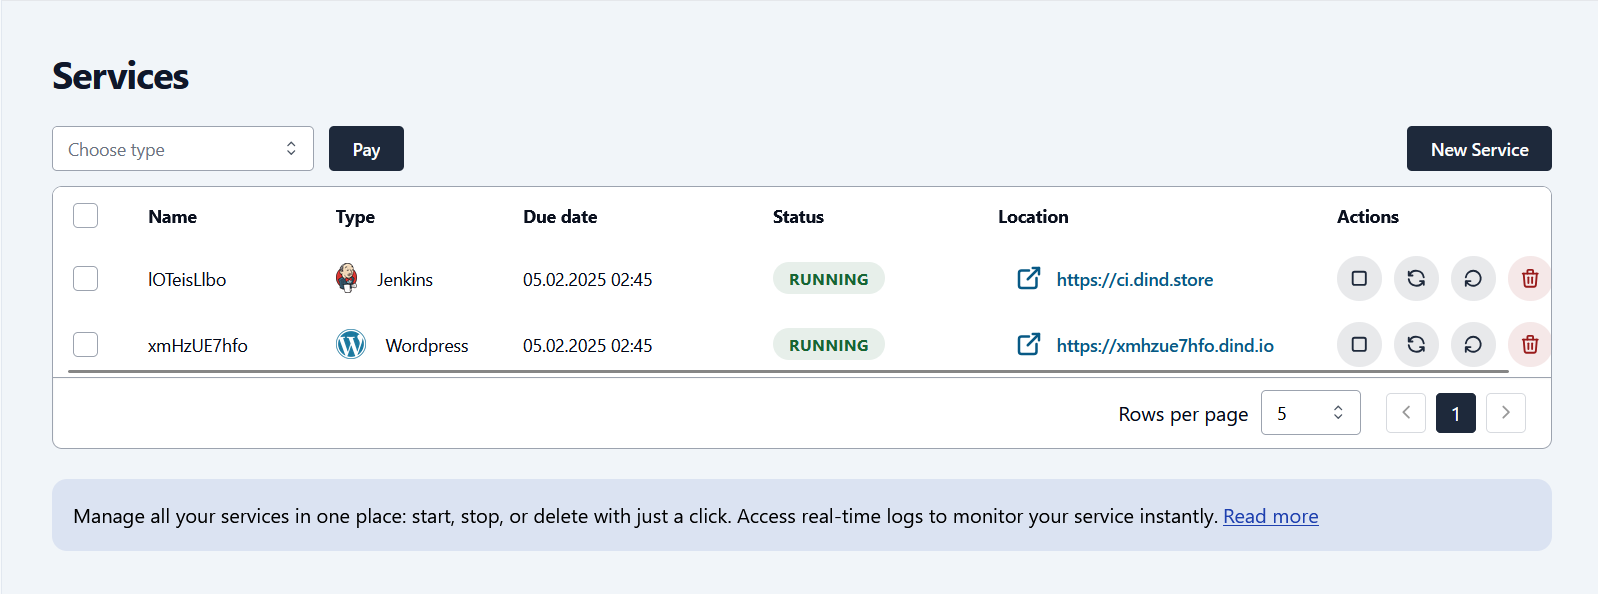
In the service list, we can now see that the URL of our service has changed in the "Location" section for the service we added the domain to.
And as we can see, our domain is now marked as "Configured."
In the service list, we can now see that the URL of our service has changed in the "Location" section for the service we added the domain to.
Generally, DNS changes take some time. You may need to wait a little for your domain to be redirected to the desired service.
4. Adding New Domain
By repeating the steps shown in section 2, let's add our dind.store domain for the "WordPress" service.
 Now, both of our domain names have been added to the Dind.io platform.
Remember: You can only redirect each domain name to one service or application. However, you can assign as many domains as you like to a single service or application. In other words, to redirect a domain you have added to another service or application, you must first remove that domain address from the platform and then add it again for the desired service or application.
5. Final Steps
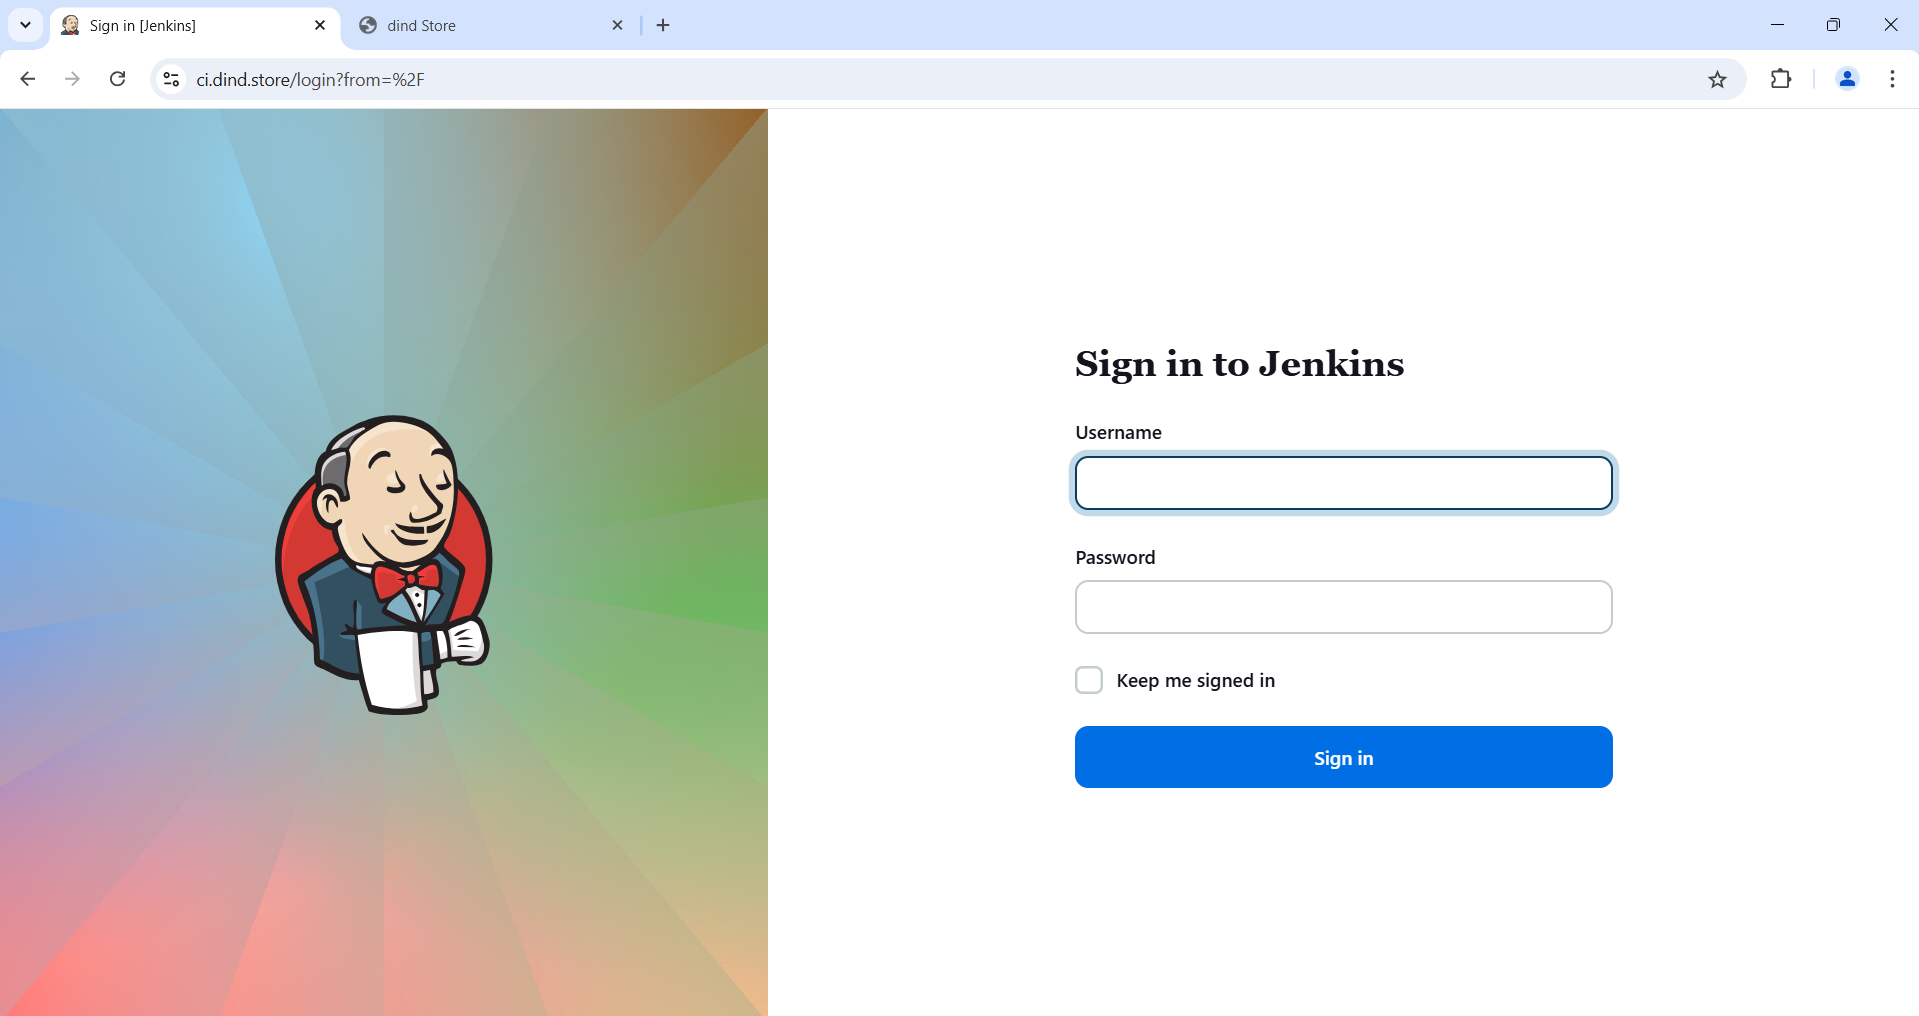
Once all settings are completed, ensure that your domains are functioning correctly. You should be able to access your WordPress and Jenkins services easily through your custom domains on the Dind.io platform.

Initially, you can add one domain to the Dind.io platform for free. Starting from the second domain, each domain addition will be subject to a fee.
If you encounter any issues, feel free to reach out to our support team. For additional questions and suggestions, you can email [email protected].